
Brainstorming for online game jams using Discord
During 2020, I facilitated brainstorming using the communication platform Discord at three online or hybrid game jams. Discord offers voice and video chat support and screensharing which are used in this method for brainstorming. Joining a voice channel with strangers can however feel intimidating, and at a larger jam, coordinating small groups requires a bit of organizer effort. This blog post goes over how it works.
Brainstorming is a social facilitation practice of game jams, in which the organizer helps jammers come up with game ideas, and in the form I’m used to facilitating brainstorming, also sets the jammers up for forming groups. Facilitated brainstorming can take many different forms, and this method using Discord is based on the Finnish Game Jam Association’s guidelines for brainstorming, put together by Elina Koskinen for GGJ 2020 – you can see her presentation slides here. Since the feedback on the brainstorming sessions was positive, I decided to share these experiences and the method used.
I’ve also shared my brainstorming Google Slides presentation for you to use!
Reasons to facilitate brainstorming in an online jam:
- get more social interaction in the online setting
- help jammers get started and
- help especially first-time jammers find teams and collaborators
If all goes well, at the end of the session, the jammers will:
- … have a game idea
- … have a team formed around that idea
- … have a channel for continued planning with the team
- … have talked with the other jammers, at least a little 🙂
To make this easier for you, I’ve shared my brainstorming slides. The session can be done in around 60 – 90 minutes, but might take less or more time depending on how many and how chatty your jammers are. The session is planned for around 20 people, but (due to Discord’s limits) up to 50 people can join.
I hope you find this helpful!

Let’s get to it: Brainstorming on Discord
The gist of this method is the following:
- Everyone joins the audio channel Main, and the organizer shares their presentation through a screensharing stream
- After some brief information, everyone quickly introduce themselves
- The brainstorming facilitator shows a category and choices in the stream
- Participants join a voice channel that corresponds to the choice
- For a few minutes, the jammers on the channel gets to know each other, and discuss game ideas
- Then, the participants rejoin the main channel to get the next category
- After all categories, jammers have some time to prepare a pitch
- The pitches are presented
- Based on the pitches, jammers who don’t have teams can join a team
The method makes use of three functionalities on Discord: text channels, voice channels, and screen sharing. Therefore the session works best in the desktop version of Discord. This method can also be combined with a stream on a platform such as twitch, but in our experience, the lag makes it somewhat less ideal that way.
Remember to let your participants know ahead of time when and where the brainstorming will take place. This way, your jammers come prepared.
Overview:
This is the rough schedule of the session (1h 15min):
- 15 min information and introductions
- 25 min brainstorming
- 20 min pitch prep time
- 15 min pitches and team formation
Needs – jammers:
- Headphones + Microphone or a headset
- Download Discord (desktop version recommended)
- Join the server
Needs – organizer:
- Brainstorming deck (slides)
- Recommended: exports of the brainstorming slides
- Headphones + Microphone
- Recommended: Webcam
- Highly recommended: Patience
So let’s get to it!
Step 1: Set up Discord
The brainstorming session needs a little bit of setup on Discord. A challenge in organizing a game jam over Discord is to make the information easy to find for your jammers. My recommendation is to use separate channels for this brainstorming session, rather than your #general or similar channel – simply to make it clear.
Note: To create channels you need the server permission “Manage Channels”.
Create the following channels:
Voice channels –
- #Main – A main stage voice channel for announcements and brainstorming information.
- #Brainstorming1, #Brainstorming2, #Brainstorming3 – Voice channels for breakout groups. As a rule of thumb, divide your participant amount by four or five – it’s hard to discuss in larger groups.
Text channels –
- #brainstorming-main – A text channel for your announcement slides. This is where participants will check for instructions and prompts, and where they will post their pitches.
- #brainstorming – A text channel for your jammers to discuss their game ideas.
To create the text channels, click the little plus-sign next to your channels-listing:

Give your channel a name and press create channel:

To create voice channels, click the plus-sign next to your Voice channels-listing. Then, remember to check “Voice channel”, name your channel and press create:

Test voice calls and screen sharing:
During the session, you’ll also need to do the following things. If you’ve never hosted a call on Discord before, or are unfamiliar with the user interface, it’s a good idea to run through the technical side with a small group before the jam, just to make sure everything works.
Joining voice channels
To join a voice channel, click its name in the channel listing. Ask your participants to mute themselves when they’re not speaking – clicking the microphone button does it. You can leave the voice channel either by joining a different voice channel or by clicking the phone button.
Sharing your screen
Start by joining the voice channel. Then, down on the left, click “Screen”.
In the window that pops up, choose an application window to share. In the settings screen, default settings are usually alright. The jammers also join the voice call, and then join the screensharing stream by clicking the stream’s preview in the voice call.
More information about screensharing: https://support.discord.com/hc/en-us/articles/360030714312
Moving members between voice channels
It can also be helpful to know you can move your members between voice channels – simply drag and drop users in the voice channel listing (note: you need the server permission Move Members to do this). Be careful though – it can be disorienting.
If you want, you can also set up roles on your Discord server – if you’re curious about reaction roles in a game jam setup, you can check my guide here: https://christinalassheikki.com/2020/08/17/setting-up-automatic-role-and-pronouns-on-discord-with-zira/

Step 2: Prepare your brainstorming deck
Next, make yourself a brainstorming presentation. In our jams, we’ve used Google Slides downloaded as a PDF document – simple, static slides without effects or videos. This way no information is lost due to streaming problems.
Technically, you can do brainstorming without a presentation – but since audio quality may be dependent on internet connections, I highly recommend you use written prompts and instructions. To make it quick and easy, you can use mine! You can find my brainstorming slides over here: Chride’s Brainstorming Slides (Google Doc)
This deck is almost ready to go, but contains placeholders for times and names. Create a copy of the file into your own Google Drive, or download it and open it in PowerPoint or Keynote, to edit the times, and make it more your own. The presentation notes contain information on what the goal of the slides are. If you want to create it from scratch, here are the slide backgrounds for you to use:


Feel free to change anything you want — reorder the slides, or throw out or add categories to fit your jam better!
Step 3: Brainstorm
Now that you have your brainstorming deck and Discord set up, you’re ready to run the session! Remember to invite your jammers as well. The brainstorming doesn’t have to be mandatory, but I’ve found it’s good to invite all jammers regardless if they already have a team.
Here are some more quick tips:
Keep the criticism away
Keep the session light-hearted. You can give silly examples (cats are a crowd-pleaser) to show that there are no bad ideas during brainstorming. The goal isn’t to have a realistic idea at the end of the session, but rather, one that the whole team wants to work on for the whole jam. The work of refining the idea starts once everyone has a team.
Amount of categories
This depends a lot on your jammers, but typically around 5 are a good amount. In the slides I shared, there are 7 prepared for you!
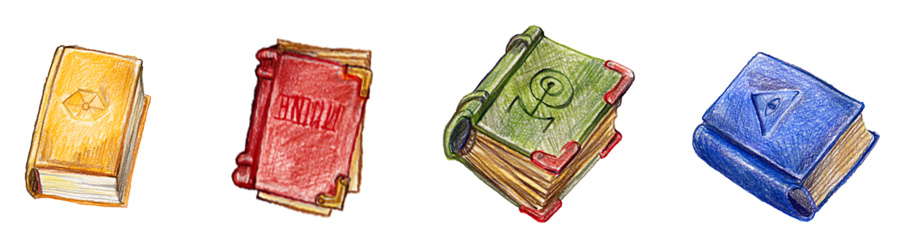
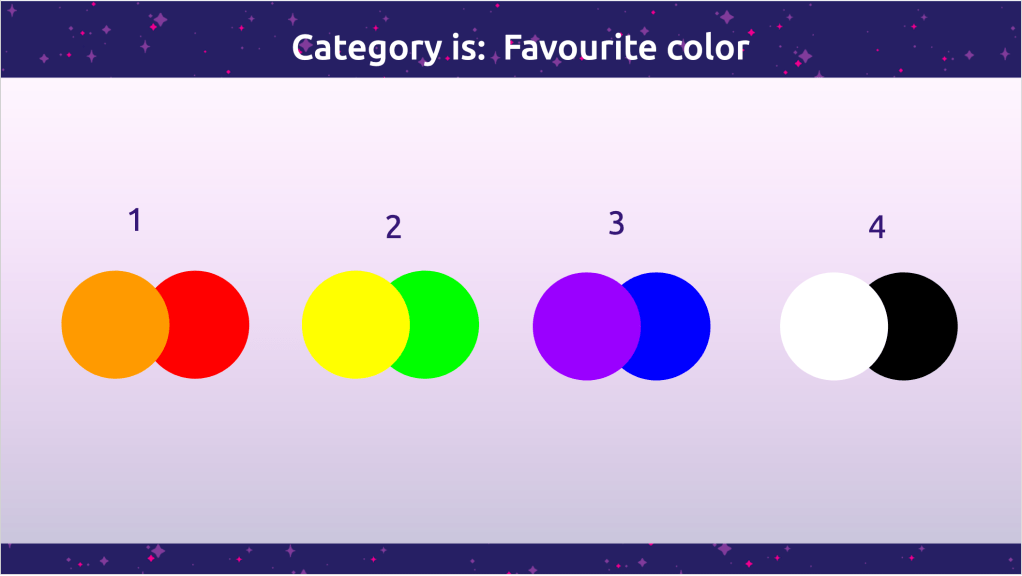
Prompts as images
During your brainstorming session, it’s really helpful to post the categories as images in the text channels as well. This way if your jammers aren’t quick enough to rejoin the stream on the Main channel, they can still see the prompts.

Step 4: Pitching
Once your jammers have brainstormed and worked on their idea for a while, it’s time to pitch!
We asked our jammers to prepare an image or short description in writing, so that in case audio cuts out, there is a visual aid to remind the other jammers of the idea:
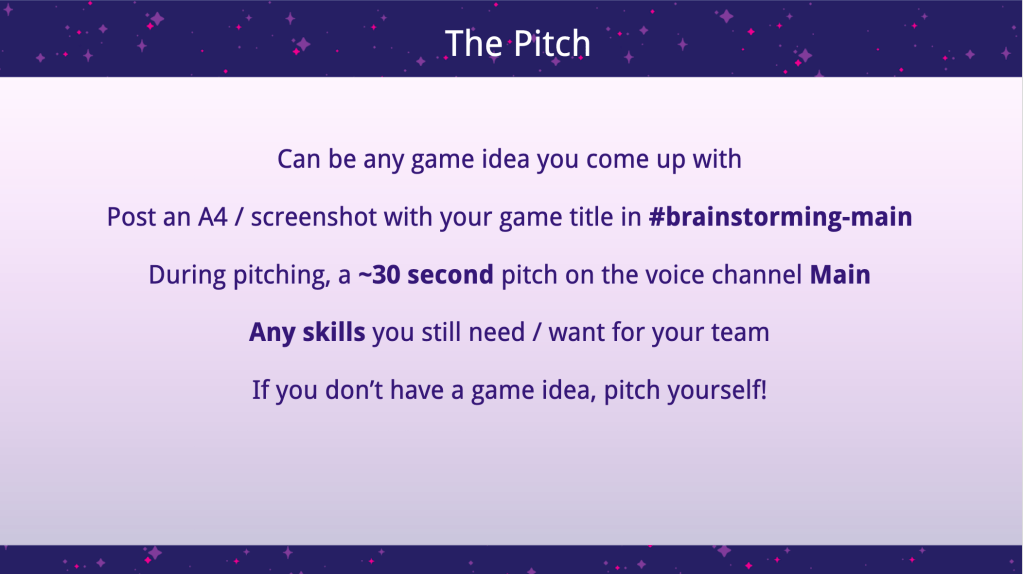
Our pitching sessions have usually been quite short. I’ve started the pitching session by reminding everyone that the goal is to find a team, and that if an idea sounds interesting, the jammers should boldly ask to join.
After this, we’ve gone through the ideas that have been posted in the text channel. One representative of the idea at the time unmutes, and presents the idea, while the facilitator shows the pitch’s image or description in the stream.
For one jam, we used a google sheet to keep track of teams and team names. Unfortunately, the anonymous nature of Discord can invite bad behaviour like trolling, so be careful with editing rights to communal documents.
Generally, I haven’t cut off the pitches at 30 seconds, but in case someone goes on for more than 2 minutes, it might be good. At the end, I ask who the team members are, and what skills the team is looking for, and ask if others are welcome to join as well. Usually the answer to the last question is yes – but the organizer asking it alleviates fear of rejection.
After the game ideas have been pitched, jammers can pitch their own skills. Make sure to listen as well – these are jammers that it’s good to check in with, to see if they did find a team.
Keep notes of who is in what team, and create text channels and voice channels for the teams to work in. Make a small invitation message in which you tag the members of the team, so that they can all find their way, and so that jammers without a team can find the channel.
At the end of the pitches, I usually say a couple of words of encouragement. Once all the pitches are over, it’s time to help people find teams. If everyone found a team already, you can wish the jammers happy jamming!
Step 5: Helping teams form
And then, we get to the last part – helping teams form. If all went well during brainstorming, jammers already started gravitating towards ideas, and forming teams. But sometimes that doesn’t happen, and you’re left with perhaps one solid team, and a handful of jammers who want to work on five different games.
One solution is to suggest the “leftover” jammers form a team together, and work to Frankenstein their game ideas into one game. It usually works, but there might be someone who opts to work alone instead. In my experience with online jams, solo developers are quite common – and compared to on-site jams, solo developers can come from surprising backgrounds.
A classic game jam constellation is a programmer, a designer and an artist working together, but game engines have become easier to use, and tutorials and learning resources have improved drastically in recent years. Teams might surprise you with what they’re able to achieve despite not having an experienced programmer.
Sometimes you still end up with lonely jammers. If they feel bad about not finding a team, perhaps you can make a game together with them? Still, unless you are organizing the jam for a group of students or children, it’s quite normal if regrettable that some jammers have a harder time finding a good team. Sometimes you can only do your best, and offer empathy and encouragement.
Lastly – Good luck, and you’re awesome!
Online jams can be a really interesting social situation, but organizing one can be equally draining as organizing an on-site game jam. Social facilitation is a luxury, not a must, but it pays dividends in creating an encouraging and stressfree atmosphere. That said – it can be pretty stressful to moderate your Discord server, run the event and stay positive. So, keep in mind you’re only human – and you’re amazing for creating this game jam in the first place!
Let me know if you have any questions!
Happy brainstorming and happy jamming!
– Chride ❤
Ps – If you want to learn more about game jam organizing, you can check out and download my thesis “Game Jams for Learning” on ResearchGate
More from Chride’s blog:
- Brainstorming for Online Game Jams Using Discord
- Media Release: Run, Darling, run! – ‘Codename Darling’ update released for Windows, Mac, web and Android
- New article out – ‘Designing Games as Playable Concepts’ in DiGRA 2020 Proceedings
- Tips for solodev game jamming
- Why I’m not doing #inktober this year, and 5 tips if you are